

Material-Based Basic Shapes 🔲
When I started to learn about shaders for game development I used to think that the easiest way to generate shapes and masks was to use textures (and certainly it is), but it is not always like that. Relying exclusively on textures can deprive you of some benefits.
To be honest, there is no easier way to achieve shapes in VFX than going into Photoshop, drawing some lines or using default tools and exporting our (maybe not) useful mask. Now you are building that beautiful effect in-game and suddenly realize that the size of your circle texture shape is wrong… 🙃
To avoid the tedious task of redoing the entire previous process and even avoid guessing the right size for our shape we can build a “dynamic” custom shape made with some math logic, so let’s get started.
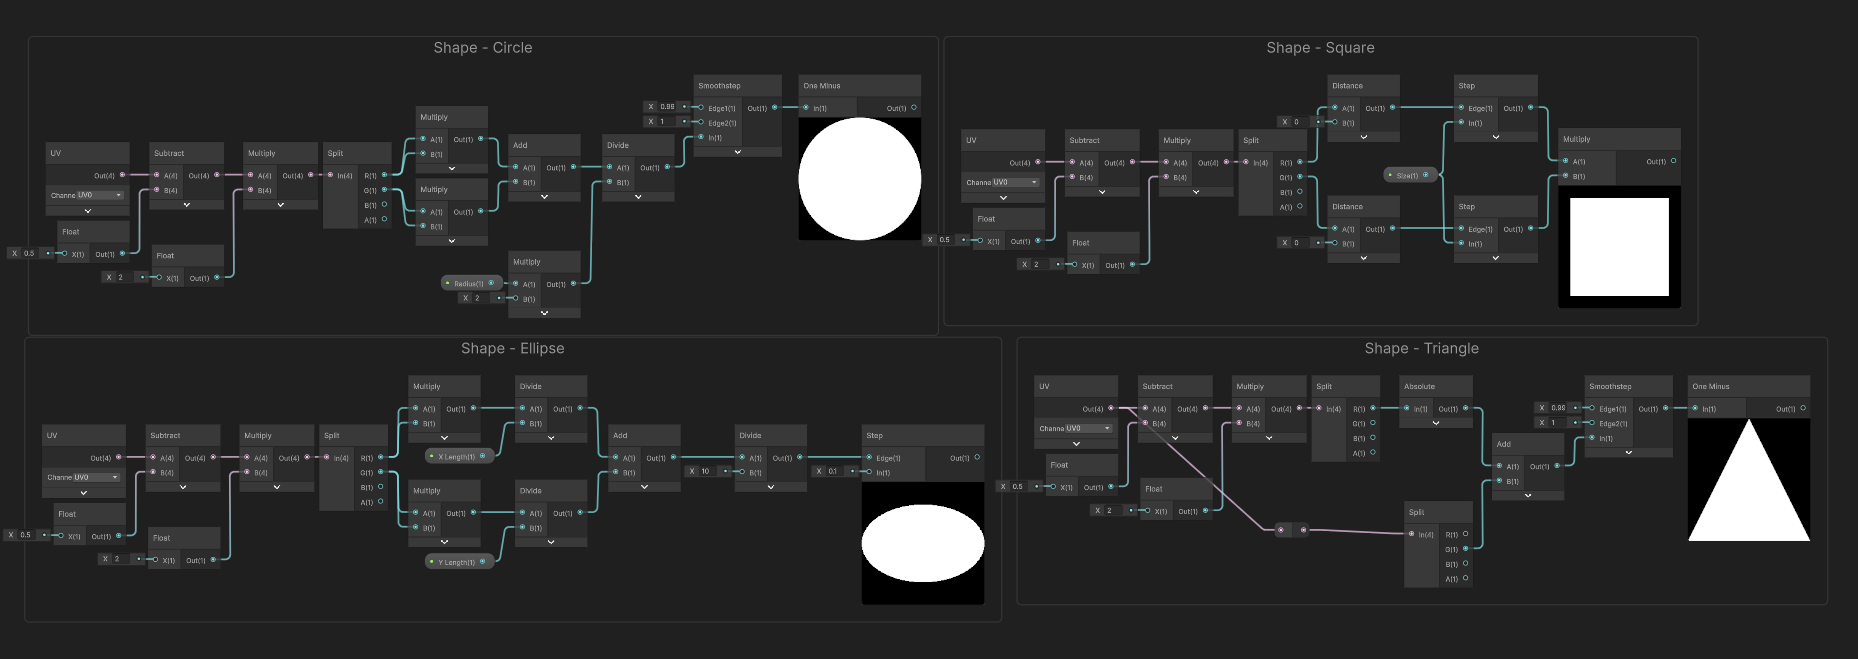
Circle
I focused on creating shapes based on the origin to facilitate the math explanation. With this in mind, the equation of the unit circle is expressed as:
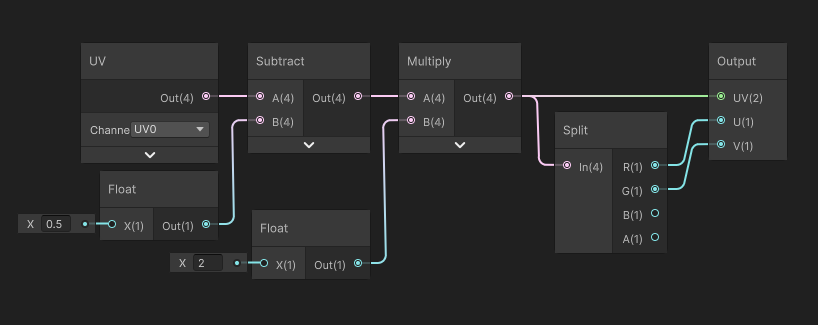
The above equation draws a circle with its origin at the coordinate (0,0) and a diameter of 1 unit. If we translate that equation to our shader, it will look like this:
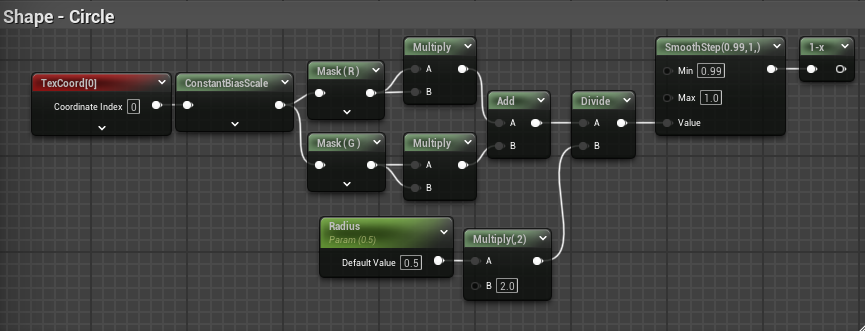
Since the equation is not very complicated, I will not go into much detail, but I will explain some points to keep in mind from the example provided (it will be the same for the other examples):
- First, I used the ConstantBiasScale node to remap the default coordinates from (0 – 1) to (-1 – 1) on both axes; you can do the same by using -0.5 for the bias input and a value of 2 for the scale.
- Next, I divided the unit result by the desired circle size. Dividing the result this way works out the circle’s diameter, so I multiplied that size by two to use it as the radius.
- Finally, I used the SmoothStep function to get sharp edges on the shape; you can also use the single Step function.
When previewing the previous shader we will see something like this:

Square
Creating a square is very easy since we will not be using a mathematical function. Keep in mind that this is not the only way to create this shape, just the simplest one I know:
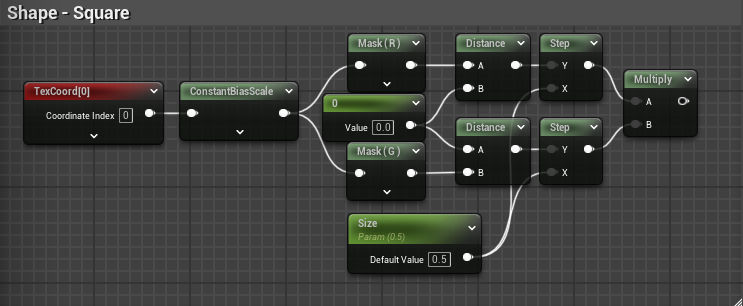
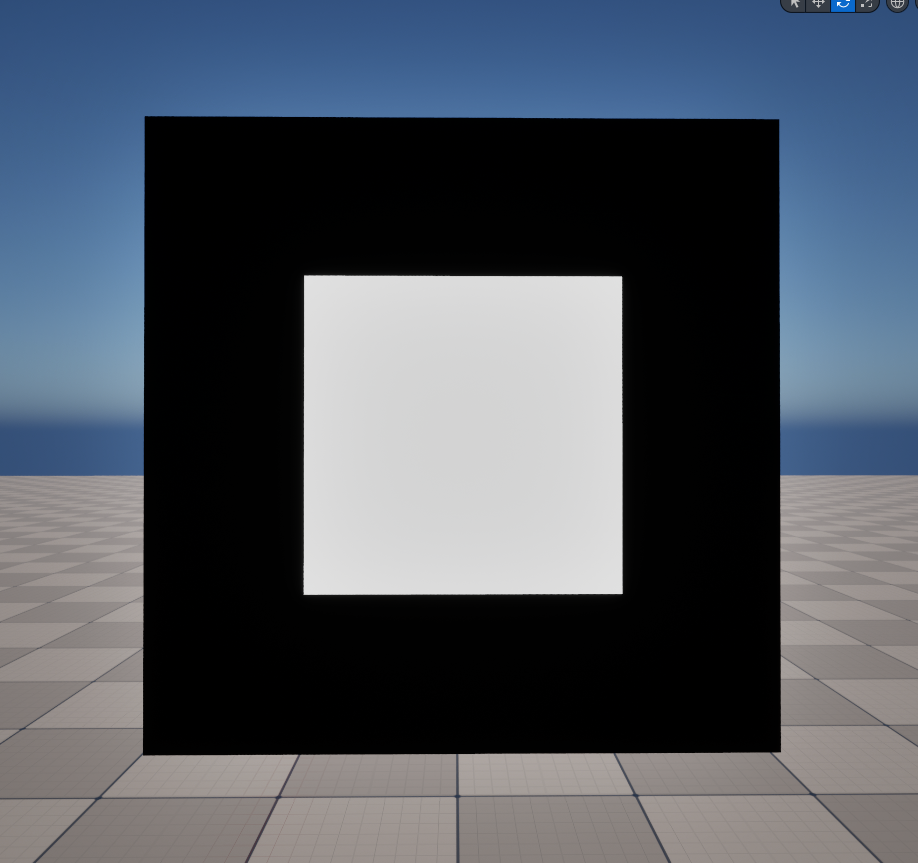
Here, the ConstantBiasScale node does the same thing as before, and the Size parameter controls the “length” of the distance values compared for both axes using the Step node. Multiplying the values draws the shape, which will look like this:
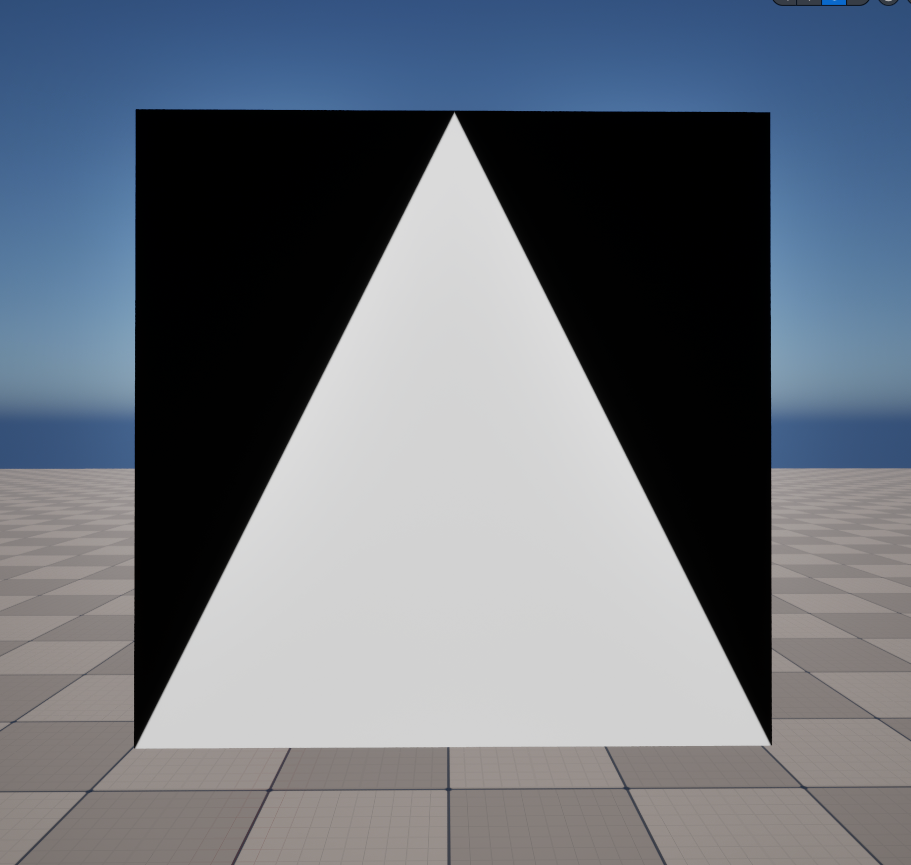
Triangle
For me, this is one of the most complex shapes to draw in a shader (without equations). The following solution may not be the best, but most importantly (for this post): it works! 😎. You can use it for prototyping or testing:
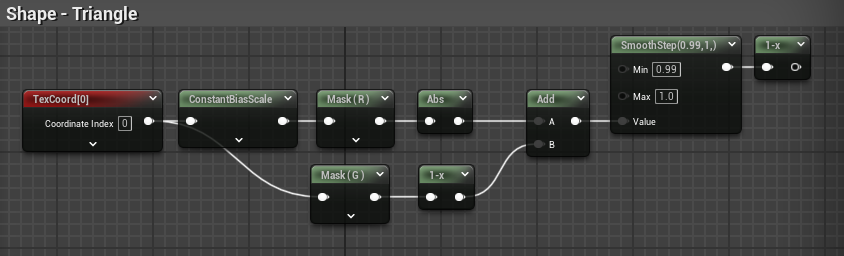
Here, I used the Abs node to recalculate all range values in the U(X) coordinate and treat them as absolute values instead of signed integers. What do you think will happen if we remove the Abs node? What if we do not remap the U coordinate? 🤔. For now, it will look like this:
Ellipse
This shape is also interesting. As we saw earlier with the circle, it will be a unit ellipse and will be useful for creating interesting shape combinations and masks for effects/materials. The equation of the unit ellipse is:
If we translate the previous equation to our shader, it will look like this:
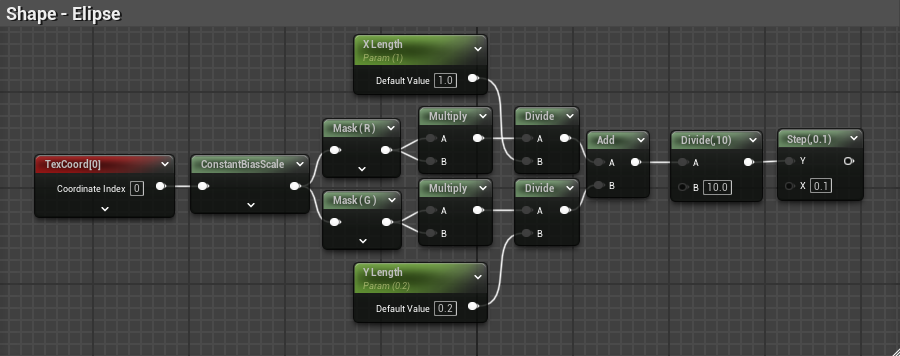
For this one I have two relevant notes:
- I used X Length and Y Length parameters to control the ellipse’s axes within the range of the Cartesian plane.
- I divided the result by 10 to normalize the length parameters to be used from 0 to 1 instead of natural numbers from 1 to 10.
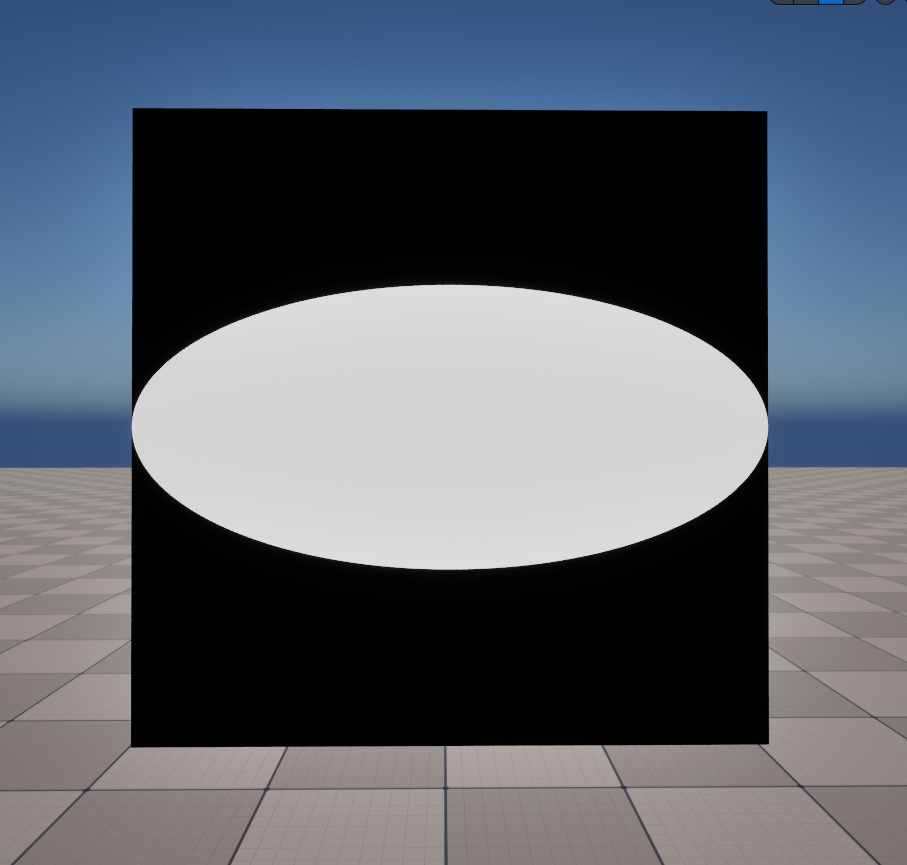
When previewing the previous shader we will see something like this:
Unity Version
There is not much difference between the two engine versions, and if you understand the basic math or concepts, you can easily replicate it. Here is the Unity version of the previous shapes:
As a Unity tip: if you want to avoid visual noise from nodes when duplicating UV remapping so many times, you can use a Sub-Graph function to encapsulate it, as you can see in the image below. By the way, this function is homologous to the Unreal’s CosntantBiasScale used before.
Conclusion
These are the simplest ways to create basic shapes that can be used in our materials and shaders, both for world space materials and UI elements. I will be adding more techniques and interesting ways to achieve new shapes in the future, and their “ported” use in Unity, of course.
For now, feel free to use these shading techniques and experiment with them. See you next time! 👋